Tag Archives: dkim

Mr. DNS: Free DNS and Network Diagnostic Tools for Sysadmins and Email Teams

Mr. DNS is a free collection of DNS and network diagnostic tools built for sysadmins, email administrators, and infrastructure teams. The site has been around for years, went offline for a while, and recently relaunched with an expanded tool set. Everything runs in the browser with no account required. If you work with DNS records, mail servers, or IP reputation, there is something here you will use regularly.
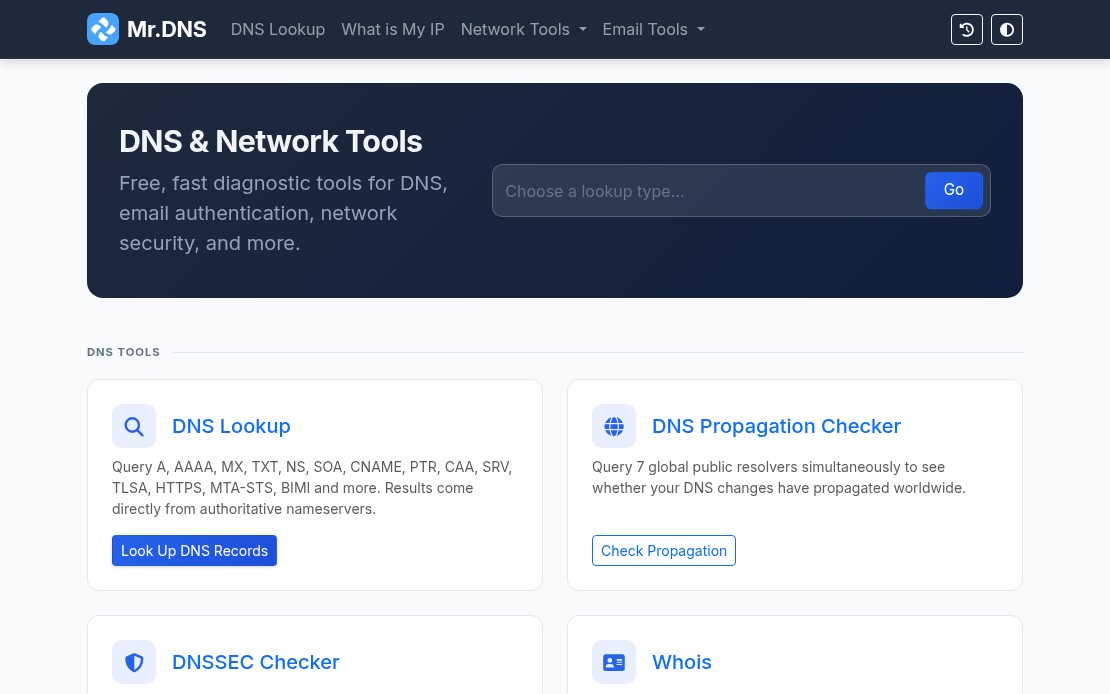
Mr. DNS homepage showing DNS and network diagnostic tools

DNS Tools

The DNS lookup tool handles all common record types: A, AAAA, MX, TXT, NS, SOA, CNAME, PTR, CAA, SRV, TLSA, HTTPS, MTA-STS, and BIMI. Results include TTL, geolocation data for nameservers, and flag icons for quick visual scanning.

The DNS propagation checker queries seven global resolvers simultaneously: Cloudflare, Google, Quad9, OpenDNS, AdGuard, NextDNS, and DNS.SB. Useful when you have just made a DNS change and need to see where it has landed without waiting or querying each resolver manually.

The DNSSEC checker validates the full chain of trust: DS records, DNSKEY records, RRSIG presence, and expiry. Good for confirming a DNSSEC deployment before and after changes.

Email Tools

The email tools are where Mr. DNS gets most of its daily use. The email health checker runs a combined SPF and DMARC evaluation and returns a letter grade (A through F) for your domain. One URL, one result, easy to share with a client or manager who needs a status report.

Mr. DNS email health checker showing an A grade for generatorlabs.com

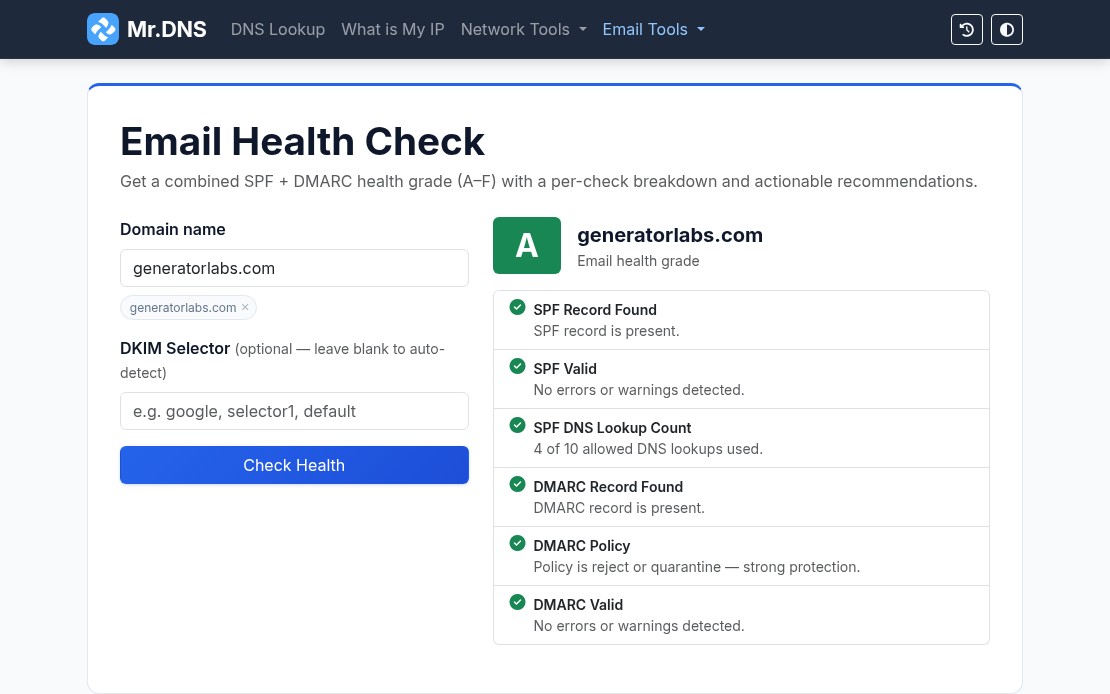
Individual checkers are also available for SPF, DMARC, and DKIM when you need to dig into a specific record. The email header analyzer parses raw RFC 2822 headers and maps the full relay chain with per-hop timing and authentication results, useful for tracing a delivery failure or diagnosing a spam classification issue.

For teams managing outbound mail infrastructure, the MTA-STS checker validates DNS records and policy files, and the BIMI checker verifies SVG logos and VMC certificates for domains using brand indicators in supported mail clients.

Blacklist Checker

The blacklist checker queries your IP or domain against 15+ major RBLs and returns results in seconds. It is a solid first step when a client reports deliverability problems or when you are onboarding a new IP range and want a quick baseline.

For teams that need ongoing coverage rather than one-off checks, blacklist monitoring from Generator Labs runs continuous checks against hundreds of data sources and sends immediate alerts when a listing is detected. The free tier covers one host with no credit card required.

SSL and Network Tools

The SSL certificate checker inspects certificate details, expiry dates, SANs, issuer chain, and key type for any domain. Useful for a quick manual check before or after a certificate renewal.

For automated tracking across many domains, certificate monitoring from Generator Labs handles the ongoing work: scheduled checks, configurable expiry alert thresholds, and multi-channel notifications before anything expires.

Other network tools include ping, traceroute, port checker, HTTP headers inspector, HTTP/2 and HTTP/3 checker, and a what is my IP tool that detects both IPv4 and IPv6 with geolocation and ASN data.

Generators

Mr. DNS includes generators for SPF records and DMARC records for teams setting up email authentication from scratch. Both walk through the options and output a ready-to-paste DNS record.

Bottom Line

Mr. DNS covers the diagnostic side of DNS and email infrastructure without requiring an account or payment. For the monitoring side, Generator Labs provides continuous blacklist monitoring and certificate monitoring with alerting, picking up where the one-shot tools leave off. Both are worth bookmarking if you manage any kind of mail or DNS infrastructure.

What Is DMARC and Why Is It Important?

Originally Posted on the Generator Labs Blacklist Monitoring Blog.

DMARC, or “Domain-Based Message Authentication, Reporting, and Conformance”, allows a domain owner to publish policies in DNS, telling remote mailers what to do with messages that do not align with these polices. DMARC is built on top of two existing technologies: SPF, or “Sender Policy Framework”, and DKIM, or “DomainKeys Identified Mail”.

By publishing a DMARC policy via DNS, domain owners can instruct remote mailers on what to do with messages that do not pass either a SPF or DKIM test. It also provides a mechanism for reporting under those policies. This gives remote mailers a channel for letting domain owners know that they received messages that did or did not align with those policies.

Why Is This Good?

The main goal of DMARC (and SPF and DKIM), is to detect and prevent email spoofing. For example, phishing scams that are designed to look like they’re coming from your bank or Paypal, prompting you to click on a link to reset your password or to give them your information.

Ultimately, SPF and DKIM are doing the hard work here. By designating email systems that are permitted to send email for a domain, and by cryptographically signing messages to avoid header modification en-route.

But DMARC ties the two technologies together, providing a single interface for instructing remote mailers on the domains policies, and actions to take when not met. It also opens up the possibilities of adding additional anti-spoofing or SPAM control software, which could also be handled under the DMARC umbrella.

For Example

As a domain owner of example.com, I can publish both SPF and DKIM records identifying my mail system (x.x.x.x) as the only authorized mail relay for my domain. I can then publish a DMARC record that tells remote mailers, that they should reject any messages that do not pass both a SPF and DKIM check, and that they should send reports to abuse@example.com to let me know if and when this happens.

A DMARC policy record, via a DNS TXT record, using the hostname _dmarc.example.com, would look something like this:

"v=DMARC1;p=reject;rua=mailto:abuse@example.com"

If a remote mail receives an inbound email from an email address @example.com, but not from my mail system (x.x.x.x), the SPF check should fail, and they should reject the email in accordance with my DMARC policy.

Technologies like DMARC, SPF, and DKIM are great tools in the seemingly never ending fight against email SPAM and spoofing.

For more information, see:

Using DKIM in Exim

Since Exim 4.70, DKIM (DomainKeys Indentified Mail – RFC4871) has been supported by default.

The current implementation supports signing outgoing mail, as well as verifying signatures in incoming messages, using the acl_smtp_dkim ACL. By default, DKIM signatures are verified as new messages come in, though no action is taken unless you’ve implicitly configured rules in the DKIM ACL.

After installing Exim (>= 4.70), you should see debug logs for incoming mail from servers that have DKIM signatures setup- they look like:

DKIM: d=gmail.com s=gamma c=relaxed/relaxed a=rsa-sha256 [verification succeeded]
Verifying Incoming Mail

By default, Exim does not filter any mail based on the validity of the DKIM signature- it’s up to you to add ACL rules to control what happens when you receive messages with “bad” signatures.

First add an ACL section for the DKIM processing; this should be included with your other ACL statements:

acl_smtp_dkim = acl_check_dkim

Next, after the “begin acl”, section, add your DKIM ACL section, and by default, accept all messages in this ACL:

acl_check_dkim:

	accept

Now you need to decide what kind of rules you want to setup- you probably don’t want to put a rule that applies to all domains- though, if the company went to the trouble of adding DKIM signatures to their e-mail, you’d hope they’d get it right, and not publish invalid public keys.

For now, let’s add a simple rule for gmail; google knows what they’re doing, so their systems should be setup correctly:

acl_check_dkim:

	#
	# check the DKIM signature for gmail
	#
	deny 	message 	= Common guys, what's going on?
		sender_domains 	= gmail.com
		dkim_signers 	= gmail.com
		dkim_status 	= none:invalid:fail

	accept

You can add as many rules, for whatever domains you want in this ACL.

Signing Outgoing Mail

Now that you’re checking incoming mail, you probably want to sign mail coming out of your system. This is a relatively easy process, that I’ve broken down into three steps:

Step1– Generate a private and public key to sign your messages; you can do this easily with openssl:

#openssl genrsa -out dkim.private.key 1024

Then extract the public key from the private key:

#openssl rsa -in dkim.private.key -out dkim.public.key -pubout -outform PEM

Step2– Configure the Exim remote-smtp transport to sign outgoing messages, using your new private key. You’ll need to pick a domain and a selector for this process.

When remote SMTP servers validate your DKIM signatures, they simply do a DNS look up, based on the selector and your domain- the domain needs to (obviously) be a valid domain you own, that you can add DNS entries to, and the selector can be any string you want. So, for example, using the domain “example.com”, and the selector “x”, you would add to the remote_smtp transport in Exim:

remote_smtp:
        driver = smtp
        dkim_domain = example.com
        dkim_selector = x
        dkim_private_key = dkim.private.key
        dkim_canon = relaxed

This tells Exim to sign any outbound e-mail, using the domain example.com, the selector “x”, and the private key we just generated. The dkim_canon = relaxed, sets the canonicalization method to use when signing messages. DKIM supports “simple” and “relaxed” algorithms- to understand the difference, see section 3.4 of the DKIM RFC.

Step3– add your DKIM public key to your DNS.

The DKIM public key generated above is advertised to other SMTP servers, using a DNS TXT record. In DNS for the domain example.com, add a new TXT record:

x._domainkey.example.com.   TXT v=DKIM1; t=y; k=rsa; p=<public key>

Where “x” is the selector you used above, and <public key> is the public key data (minus the key header/footer text).

When setup correctly, your DKIM text record should look something like this:

# host -t txt x._domainkey.example.com

x._domainkey.example.com descriptive text "v=DKIM1\; t=y\; k=rsa\; p=MIGfMA0GCS
qGSIb3DQEBAQUAA4GNADCBiQKBgQC5k8yUyuyu9UAVHHU7Al4ppTDtxFWsZ6Pqd9NWZnomtewBdz8I
2LJkqmA/3Cyb5Eiaqk4NulPFfDbfA0Lkw7SNyOS9BRN02KGtKIWjFqDwjB99haaWYw9H4IZcuJp0Y
q0kySCdBp/sPP+iTotdBiE85Jakw3tzgYkdvaS05ZUdBwIDAQAB"

(lines breaks were added for readability- your entry should be one continuous line)

This DNS record is referred to as the “selector” record; you need to also setup a “policy” record. The policy record is your domains policy for domain keys- you should start with something like:

_domainkey.example.com. t=y; o=~;

The t=y specifies that you are in test mode and this should be removed when you are certain that your domain key setup is functioning properly. The “~” in the o=~ specifies that some of the mail from your domain is signed, but not all. You could also specify o=- if all of the mail coming from your domain will be signed.

Once you have all of that in-place,  restart Exim, and send out a message using the remote-smtp transport. You should now see a DKIM-Signature: header listed in the message headers, which lists your domain (as d=), and selector (as s=), as well as a signature for this e-mail, which can be validated against your public DKIM key, that you’ve published in DNS.

For more information, see the Exim DKIM page, or the DKIM RFC.

UPDATE:

Once you’ve set everything up, you can test your DKIM (and SPF and SenderID, etc) install, by using the port25.com validation service.

Just send an e-mail to check-auth@verifier.port25.com, and it will auto-respond with a validation report

UPDATE 2:

I’ve updated this to use a key length of at least 1024 bits, otherwise it’s possible to crack the DKIM key, and fake it to show that your email is valid. This came to light largely because of an article about how Google was using a 512 bit key and a “hacker” factored the key, and spoofed emails to the Google founders:

http://www.wired.com/threatlevel/2012/10/dkim-vulnerability-widespread/

I previously listed a key length of 768, which is significantly harder to break than a 512 bit key, but just to be safe, use 1024 or better yet, 2048.