Tag Archives: email

Mr. DNS: Free DNS and Network Diagnostic Tools for Sysadmins and Email Teams

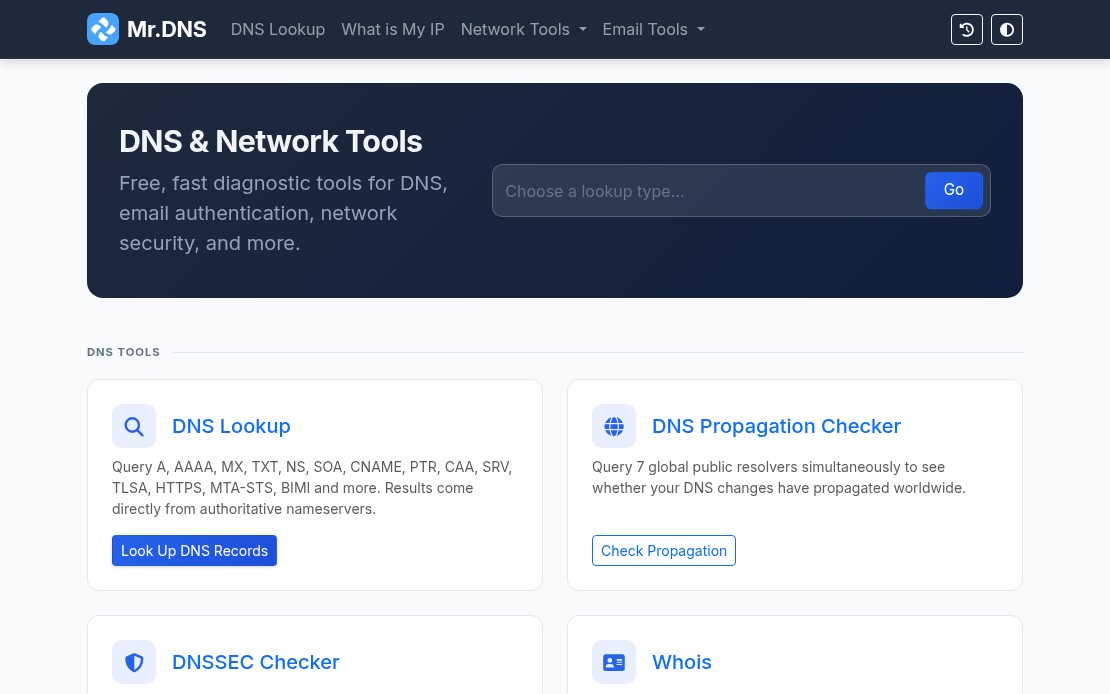
Mr. DNS is a free collection of DNS and network diagnostic tools built for sysadmins, email administrators, and infrastructure teams. The site has been around for years, went offline for a while, and recently relaunched with an expanded tool set. Everything runs in the browser with no account required. If you work with DNS records, mail servers, or IP reputation, there is something here you will use regularly.

Mr. DNS homepage showing DNS and network diagnostic tools

DNS Tools

The DNS lookup tool handles all common record types: A, AAAA, MX, TXT, NS, SOA, CNAME, PTR, CAA, SRV, TLSA, HTTPS, MTA-STS, and BIMI. Results include TTL, geolocation data for nameservers, and flag icons for quick visual scanning.

The DNS propagation checker queries seven global resolvers simultaneously: Cloudflare, Google, Quad9, OpenDNS, AdGuard, NextDNS, and DNS.SB. Useful when you have just made a DNS change and need to see where it has landed without waiting or querying each resolver manually.

The DNSSEC checker validates the full chain of trust: DS records, DNSKEY records, RRSIG presence, and expiry. Good for confirming a DNSSEC deployment before and after changes.

Email Tools

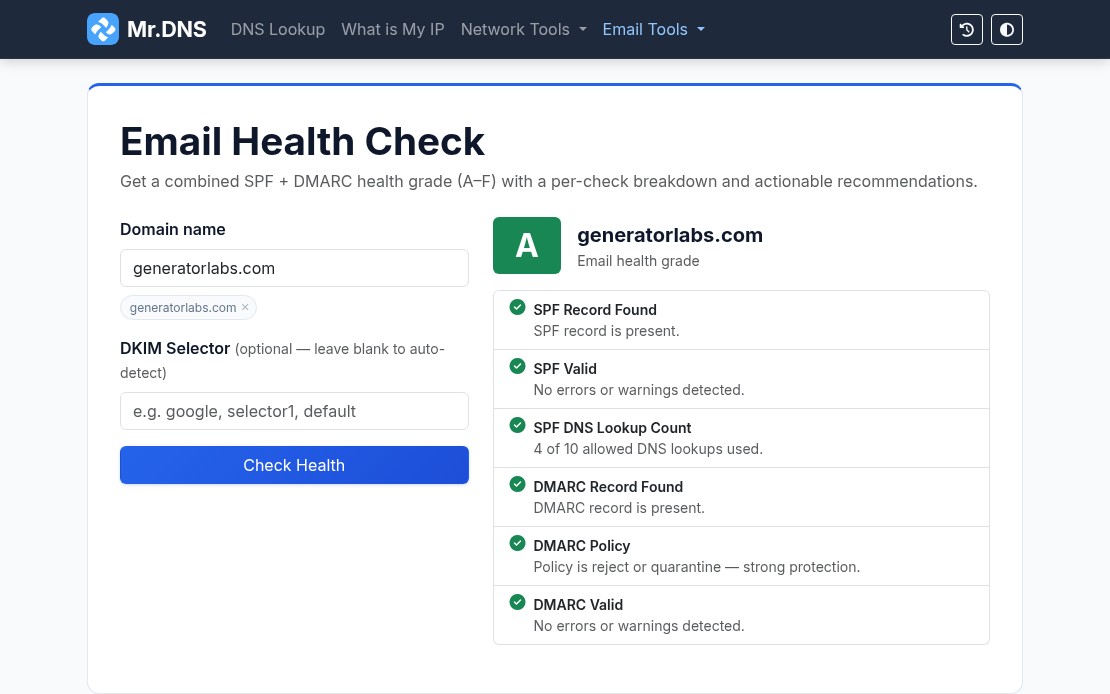
The email tools are where Mr. DNS gets most of its daily use. The email health checker runs a combined SPF and DMARC evaluation and returns a letter grade (A through F) for your domain. One URL, one result, easy to share with a client or manager who needs a status report.

Mr. DNS email health checker showing an A grade for generatorlabs.com

Individual checkers are also available for SPF, DMARC, and DKIM when you need to dig into a specific record. The email header analyzer parses raw RFC 2822 headers and maps the full relay chain with per-hop timing and authentication results, useful for tracing a delivery failure or diagnosing a spam classification issue.

For teams managing outbound mail infrastructure, the MTA-STS checker validates DNS records and policy files, and the BIMI checker verifies SVG logos and VMC certificates for domains using brand indicators in supported mail clients.

Blacklist Checker

The blacklist checker queries your IP or domain against 15+ major RBLs and returns results in seconds. It is a solid first step when a client reports deliverability problems or when you are onboarding a new IP range and want a quick baseline.

For teams that need ongoing coverage rather than one-off checks, blacklist monitoring from Generator Labs runs continuous checks against hundreds of data sources and sends immediate alerts when a listing is detected. The free tier covers one host with no credit card required.

SSL and Network Tools

The SSL certificate checker inspects certificate details, expiry dates, SANs, issuer chain, and key type for any domain. Useful for a quick manual check before or after a certificate renewal.

For automated tracking across many domains, certificate monitoring from Generator Labs handles the ongoing work: scheduled checks, configurable expiry alert thresholds, and multi-channel notifications before anything expires.

Other network tools include ping, traceroute, port checker, HTTP headers inspector, HTTP/2 and HTTP/3 checker, and a what is my IP tool that detects both IPv4 and IPv6 with geolocation and ASN data.

Generators

Mr. DNS includes generators for SPF records and DMARC records for teams setting up email authentication from scratch. Both walk through the options and output a ready-to-paste DNS record.

Bottom Line

Mr. DNS covers the diagnostic side of DNS and email infrastructure without requiring an account or payment. For the monitoring side, Generator Labs provides continuous blacklist monitoring and certificate monitoring with alerting, picking up where the one-shot tools leave off. Both are worth bookmarking if you manage any kind of mail or DNS infrastructure.

Generator Labs: Blacklist and Certificate Monitoring for Email and Infrastructure Teams

Generator Labs provides infrastructure monitoring for teams that need to stay ahead of two specific problems: IP and domain blacklistings that kill email deliverability, and SSL certificates that expire without warning. Both products run in the same portal, so you manage everything in one place.

Blacklist Monitoring

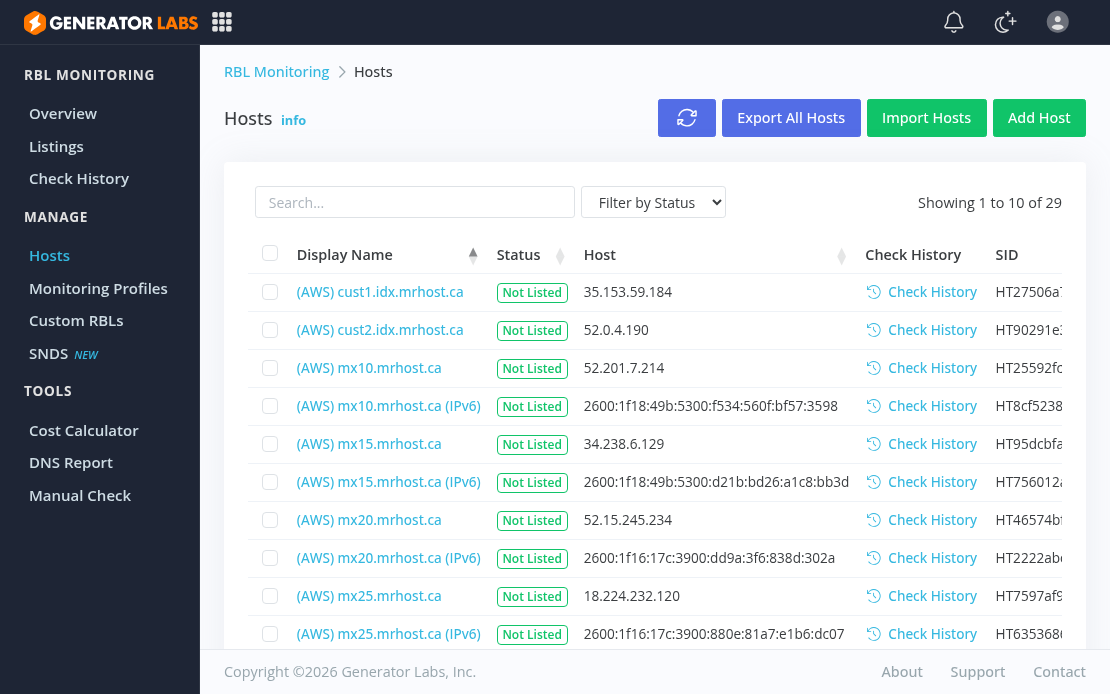
Blacklist monitoring runs continuous checks of your IPv4 addresses, IPv6 addresses, and domains against hundreds of RBL and URIBL data sources. The moment a listing is detected, alerts go out through whatever channels you have configured: email, SMS, Slack, Discord, PagerDuty, or webhooks.

Coverage is the differentiator. Free one-shot tools check a handful of the major lists. Generator Labs checks well over a hundred data sources on a schedule, including 30+ premium sources on Enterprise and Ultimate plans that free tools do not cover. You get notified when something changes; you are not logging in to run a manual check.

Other features worth knowing:

Full IPv6 support. IPv4 and IPv6 addresses are both monitored across all plans. As more mail infrastructure goes dual-stack, IPv6 blacklisting is a real and growing issue that most monitoring tools still treat as secondary.

Shareable public reports. Every monitored host gets a public report URL you can hand to a client, ISP, or manager without giving anyone portal access.

REST API. Full programmatic access to monitoring data and controls, with client libraries for PHP, Node.js, and Python.

Generator Labs RBL Monitoring hosts list

Blacklist Monitoring Pricing

  • Free: 1 host, 48-hour check interval, 100+ data sources. Free forever, no credit card required.
  • Professional: $8/month for 20 hosts at 24-hour intervals.
  • Enterprise: $16/month for 50 hosts at 12-hour intervals, premium data sources, custom run times.
  • Ultimate: $0.005 per check, unlimited hosts, custom intervals, all premium sources.

The Ultimate pay-per-check plan scales cleanly for larger deployments. Running 50 hosts daily against 150 data sources works out to roughly $11/month.

Certificate Monitoring

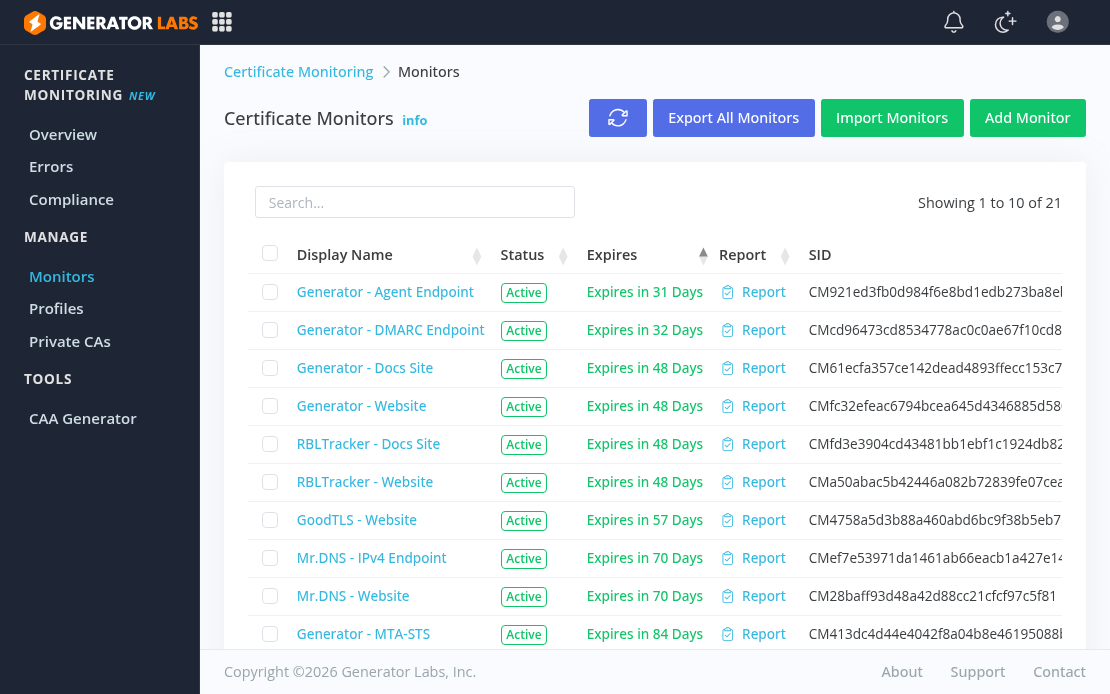
Certificate monitoring tracks SSL/TLS certificate expirations across your domains and sends alerts before anything expires. Add your domains, set alert thresholds, and the service runs automatically from there.

Both publicly-trusted and private or internal CA certificates are supported, which matters for teams running internal infrastructure that does not go through a public CA. Certificate expiry causes outages that are entirely preventable; automated monitoring removes the spreadsheet tracking and calendar reminders that most teams fall back on.

Generator Labs Certificate Monitoring monitors list

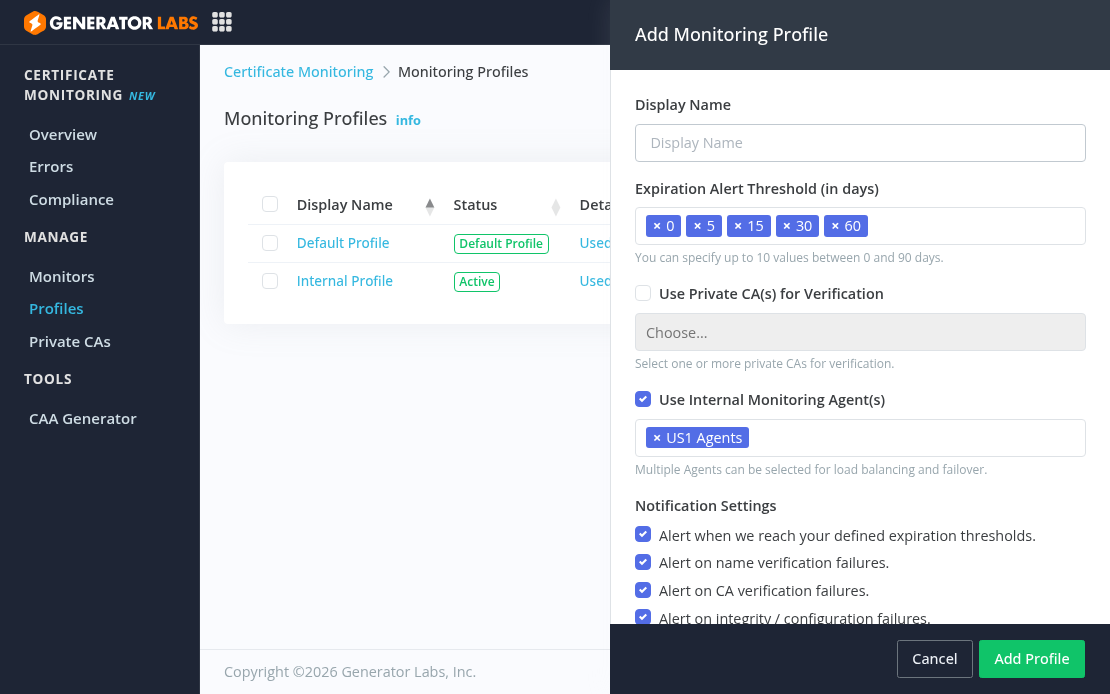
Monitoring profiles let you define reusable alert configurations across multiple monitors. Set custom expiration alert windows (5, 15, 30, 60 days, or any combination you need), choose which failure types trigger alerts, and assign private CAs or internal monitoring agents. One profile can cover dozens of monitors.

Generator Labs Certificate Monitoring add profile dialog

Certificate Monitoring Pricing

Certificate monitoring is priced at $0.01 per host per day, with no fixed tiers. You pay for what you monitor and can add or remove domains at any time.

Who It Is For

  • Email service providers and hosting companies monitoring large IP ranges
  • IT and security teams who need immediate notification when a host gets listed
  • Organizations managing many domains who need certificate expiry visibility without manual tracking
  • Developers who want API access to monitoring data for automation or integration

Get Started

Generator Labs offers continuous blacklist monitoring and certificate monitoring with solid alert coverage and a complete API. The free tier is a real free tier. Sign up at portal.generatorlabs.com to get started, no credit card required.

What Is DMARC and Why Is It Important?

Originally Posted on the Generator Labs Blacklist Monitoring Blog.

DMARC, or “Domain-Based Message Authentication, Reporting, and Conformance”, allows a domain owner to publish policies in DNS, telling remote mailers what to do with messages that do not align with these polices. DMARC is built on top of two existing technologies: SPF, or “Sender Policy Framework”, and DKIM, or “DomainKeys Identified Mail”.

By publishing a DMARC policy via DNS, domain owners can instruct remote mailers on what to do with messages that do not pass either a SPF or DKIM test. It also provides a mechanism for reporting under those policies. This gives remote mailers a channel for letting domain owners know that they received messages that did or did not align with those policies.

Why Is This Good?

The main goal of DMARC (and SPF and DKIM), is to detect and prevent email spoofing. For example, phishing scams that are designed to look like they’re coming from your bank or Paypal, prompting you to click on a link to reset your password or to give them your information.

Ultimately, SPF and DKIM are doing the hard work here. By designating email systems that are permitted to send email for a domain, and by cryptographically signing messages to avoid header modification en-route.

But DMARC ties the two technologies together, providing a single interface for instructing remote mailers on the domains policies, and actions to take when not met. It also opens up the possibilities of adding additional anti-spoofing or SPAM control software, which could also be handled under the DMARC umbrella.

For Example

As a domain owner of example.com, I can publish both SPF and DKIM records identifying my mail system (x.x.x.x) as the only authorized mail relay for my domain. I can then publish a DMARC record that tells remote mailers, that they should reject any messages that do not pass both a SPF and DKIM check, and that they should send reports to abuse@example.com to let me know if and when this happens.

A DMARC policy record, via a DNS TXT record, using the hostname _dmarc.example.com, would look something like this:

"v=DMARC1;p=reject;rua=mailto:abuse@example.com"

If a remote mail receives an inbound email from an email address @example.com, but not from my mail system (x.x.x.x), the SPF check should fail, and they should reject the email in accordance with my DMARC policy.

Technologies like DMARC, SPF, and DKIM are great tools in the seemingly never ending fight against email SPAM and spoofing.

For more information, see:

Secure Email – Exim, Dovecot, Perdition.

Is your email secure?

The default behavior of POP3 and IMAP, is to pass your username and password (and all your e-mail for that matter) over a socket with no encryption. This means that all that information is susceptible to a “man in the middle” type attack, where the plain text packets can be intercepted and read.

Is that really going to happen? Probably not, but you can avoid it, by setting up your e-mail servers to provide SSL encryption for all incoming and outgoing email.

This post will talk only about the mail server software I use: Exim (SMTP), Dovecot (POP3 & IMAP) and Perdition (for POP3/IMAP proxying / load balancing).

SSL vs. TLS vs. STARTTLS

First off, there’s a lot of confusion around the naming conventions.

TLS (Transport Layer Security) is SSL- technically, TLS version 1 is SSL version 3. The use of SSL v1 and v2 should be avoided if not completed disabled, so for all intents and purposes, when we say “SSL”, we mean SSL v3.

SSL uses separate dedicated ports for mail: 993 for secure IMAP, 995 for secure POP3 and 465 for secure SMTP. The encrypted connection is negotiated immediately after the socket is opened, and all communication is encrypted. This is more attune to how HTTPS works. The downside with this implementation, is that the service is provided on different ports, which may mean changes to your firewall rules, ACL’s and mail clients.

STARTTLS is a command implementation that works on the existing IMAP, POP3 and SMTP ports. The email client connects to the normal unencrypted ports, and uses a plain text command (STARTTLS in SMTP and IMAP, and STLS in POP3) to initiate a TLS (SSLv3) connection. From that point on, all communication is encrypted. The plus with this, is that the service works over the existing ports, so no firewall or ACL changes are needed.

A big part of the confusion comes from the mail clients, as they all seem to refer to the implementations with different names:

http://en.wikipedia.org/wiki/Comparison_of_e-mail_clients#SSL_and_TLS_support

In a lot of cases, the options are between “SSL” and “TLS”; SSL being an SSLv3 (TLS) connection on the different ports, and TLS meaning a STARTTLS connection. So for this post, we’ll use the same language.

We’re going to setup both (SSL and STARTTLS), which gives us the most flexibility with our clients, though technically, having dedicated ports for SSL services was deprecated in favor of STARTTLS, as it was thought that using two different ports for plaintext and SSL connections seemed wasteful.

Certificates

For our purposes, we’re just going to use a self-signed certificate for e-mail. This provides the same encryption as a certificate bought from a trusted authority- the only difference is the trust part. Obviously, if you’re going to set this up for customers or for the general public, a trusted authority is better, as you won’t receive any of those annoying trust errors when connecting.

There’s a million tutorials out there that show you how to create a self-signed certificate, so I won’t go on too much about this. There’s even a handy site that will generate it for you online.

http://www.selfsignedcertificate.com/

Create  the key:

openssl genrsa -out mail.example.com.key 2048

Create the certificate:

openssl req -new -x509 -key mail.example.com.key -out mail.example.com.crt -days 3650 -subj /CN=mail.example.com

Exim

The SSL config for Exim is pretty straight forward:

tls_advertise_hosts     = *
tls_on_connect_ports    = 465
tls_certificate         = /path/to/ssl/mail.example.com.crt
tls_privatekey          = /path/to/ssl/mail.example.com.key

This basically says to advertise STARTTLS to everybody (*), to assume connections on port 456 are SSL connections, and use the certificate and key files referenced.

To make SSL work on port 465, you’ll need to tell Exim to also listen on that port. This would likely require adding another entry to your “local_interfaces” option- something like:

local_interfaces = 192.168.0.1.25:192.168.0.1.587:192.168.0.1.465

Restart Exim, and SSL should work. More information can be found here.

Dovecot

Dovecot provides POP3 and IMAP services, and supports both SSL and STARTTLS. The setup, again, is pretty straight forward:

protocols = imap pop3 imaps pop3s
ssl = yes
ssl_cert = </path/to/ssl/mail.example.com.crt
ssl_key = </path/to/ssl/mail.example.com.key

Restart Dovecot and test. More information can be found here.

Perdition

Perdition is a mail retrieval proxy. It handles load balancing and load distribution of POP3/IMAP connections, by proxying based on database or regex lookups. One other nice feature of Perdition, is that it can offload the encryption handling of mail connections. It can handle the SSL/STARTTLS negotiation, and then proxy the connections to local servers unencrytped, which reduces the overhead on the actual mail servers.

In my system, I use Perdition to load balance mail between multiple mail servers, as well as handle all the encryption/decryption.

Copy your imap4 and pop3 config files to new imap4s and pop3s config files, and change each, respectively, to:

protocol IMAP4S

and

protocol POP3S

and then add to each:

ssl_mode ssl_listen
ssl_cert_file /path/to/ssl/mail.example.com.crt
ssl_key_file /path/to/ssl/mail.example.com.key

Now, like I said before, in my case I only listen for encrypted connections with Perdition, then I relay mail internally over a non-encrypted link. Perdition has all sorts of ssl_mod options for handling different setups.

In my existing imap4 and pop3 config files I also added:

ssl_mode tls_listen
ssl_cert_file /path/to/ssl/mail.example.com.crt
ssl_key_file /path/to/ssl/mail.example.com.key

Telling it to listen for STARTTLS requests on the non-secure IMAP and POP3 ports.

Restart your existing IMAP4 and POP3 servers, and then start two new perdition instances, using the new IMAPs and POP3s config files.

Testing

The easiest way to test is to use the OpenSSL command line “s_client”, which lets you connect to encrypted services as a client, and validate that the SSL config is working.

IMAPs (SSL)

openssl s_client -connect mail.example.com:993

IMAP + STARTTLS

openssl s_client -connect mail.example.com:143 -crlf -starttls imap

POP3s (SSL)

openssl s_client -connect mail.example.com:995

POP3 + STARTTLS

openssl s_client -connect mail.example.com:110 -crlf -starttls pop3

SMTPs (SSL)

openssl s_client -connect mail.example.com:465

SMTP + STARTTLS

openssl s_client -connect mail.example.com:25 -crlf -starttls smtp

Adding encryption to your mail system is easy, and pretty much every mail client supports either SSL or STARTTLS, if not both.